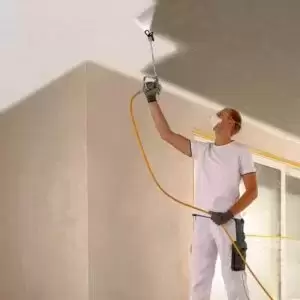
How To Use An Airless Sprayer To Paint.
Date: 24 Jun 2024
Airless paint sprayers are by far the most efficient way to paint. Learn more about how to use them and the best techniques for painting your home’s exterior.
Painting with an Airless Paint Sprayer
Every professional painter in New Zealand knows the value of an airless paint sprayer. It's the most efficient way to deliver paint onto a surface, saving both time and money. Additionally, the smooth, even finish that sprayers provide is unmatched by brushes or rollers.
Using a paint sprayer might seem daunting, but it only takes a few minutes to learn the proper technique. Here are some tips to get you started with exterior painting, many of which are also useful for other projects involving a sprayer.
What Is an Airless Paint Sprayer?
Airless sprayers work by pumping paint at very high pressures, sometimes up to 3,000 psi. These sprayers draw paint from a large bucket, which means fewer refills, and the gun is lighter because it’s not attached to the paint reservoir. Airless sprayers can be used for both paint and finishes, with different tips available for various materials.
Keep the Gun Perpendicular to the Wall
To achieve a consistent layer of paint, hold the sprayer tip about 30cm from the surface and keep the gun perpendicular to the wall. This technique is crucial for a professional finish. Practice on a less visible wall until you get the hang of it.
Tape Off Windows and Doors
Before starting, tape off your windows and doors. Use dispensers that roll out both tape and plastic simultaneously to protect the face of the trim.
Keep a Lid on the Bucket
Always keep the lid on the paint bucket. Remove the small cap and insert the intake tube into the smaller hole. This prevents debris from entering the paint and causing clogs. An open bucket dries out faster, and dried paint clumps can also clog the sprayer. Always use a 20lt bucket, even if your project requires less paint.
Overlap 50 Percent and Keep the Gun Moving
Overlap each pass by about 50 percent. Release the trigger at the end of each pass and start the gun in motion before pulling the trigger to avoid globs of paint. When spraying under lap siding or trim boards, angle the tip upward to ensure even coverage. Start at the top of the wall and work your way down.
Back-Roll, Then Re-coat
After back-brushing, it's time to back-roll. Don’t spray too large an area at once, as the paint might dry before you can roll it out. A roller with a thicker nap, like a 20mm, is better for uneven surfaces. Always roll in an up-and-down motion to avoid drips. One coat may suffice if you're applying a new coat of the same colour, but a second coat is needed for new siding or colour changes. No back-brushing or back-rolling is necessary for the final coat, which goes on quickly and hides minor brush and roller marks.
Back-Brush the Nooks and Crannies
A paint sprayer is only a paint delivery system. To ensure the coating lasts for years, you need to push paint into every crack and crevice with a brush. This step might seem tedious, but it's essential for a durable finish.
By following these steps, you can achieve a professional finish with your airless paint sprayer, making your exterior painting projects in New Zealand efficient and effective.
Back...
