How to Pour a Small Concrete Slab: A New Zealand Guide
Date: 16 Jul 2024
Pouring a small concrete slab is a straightforward project that can be accomplished by most DIY enthusiasts. Whether you are looking to create a patio, a shed base, or a garden path, following the correct steps will ensure a durable and professional finish. Here's a step-by-step guide tailored for New Zealand conditions and standards.
Materials and Tools You Will Need
- Concrete mix (ready-mix or ingredients to mix your own)
- Formwork timber (treated timber is recommended)
- Reinforcement mesh (optional for added strength)
- String line and stakes
- Shovel and spade
- Wheelbarrow or concrete mixer
- Level
- Trowel and float
- Concrete screed (straight edge)
- Measuring tape
- Concrete vibrator (optional)
- Water
Step-by-Step Guide
Planning and Measuring
- Determine the size and location of your slab. Mark the area using string lines and stakes. Ensure the area is level and clear of debris.
- In New Zealand, it's important to check local council regulations or consent requirements, especially for larger slabs or those near property boundaries.
Excavation
- Excavate the marked area to a depth of about 100mm (for general use). For heavier loads, consider a depth of 150mm.
- Ensure the base is compacted and level. A well-compacted base prevents settling and cracking.
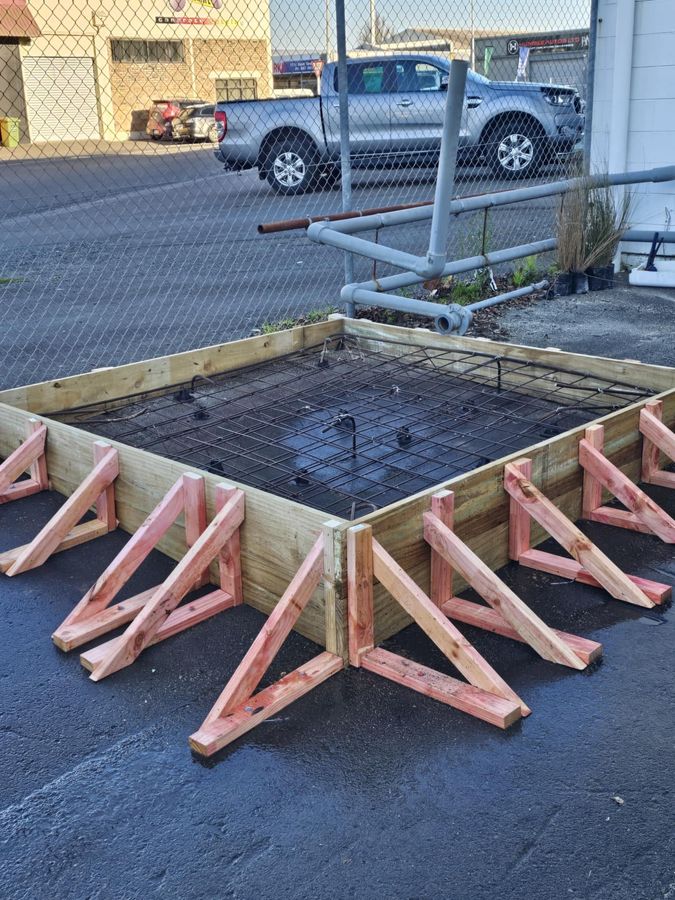
Setting Up Formwork
- Construct the formwork using timber, ensuring it is level and secured firmly. The formwork acts as a mold for the concrete.
- Check all corners with a carpenter's square to ensure they are at right angles.
Adding Reinforcement
- Place a reinforcement mesh within the formwork if extra strength is needed. This is particularly useful for larger slabs or areas with heavy traffic.
- Ensure the mesh is raised slightly off the ground using small concrete blocks.
Mixing the Concrete
- Mix the concrete according to the instructions on the bag if using a ready-mix. For DIY mixing, combine one part cement, two parts sand, and four parts gravel, adding water until you reach a workable consistency.
- In New Zealand, it is crucial to consider the weather. Concrete should be mixed and poured when temperatures are between 10°C and 25°C. Avoid extremely hot or cold days.
Pouring the Concrete
- Pour the concrete into the formwork starting from one corner and working your way across. Use a shovel to distribute it evenly.
- As you pour, use a concrete vibrator or tamp the mix down with a piece of timber to remove air pockets and ensure a solid fill.
Leveling and Screeding
- Once the formwork is filled, use a screed (a straight edge) to level the concrete. Drag the screed across the top of the formwork in a sawing motion to achieve a flat surface.
- Check the level frequently and add or remove concrete as necessary.
Finishing
- Use a trowel to smooth the surface after screeding. For a more polished finish, use a float to further smooth and compact the surface.
- If you need a non-slip surface, consider adding a broom finish by dragging a broom across the surface before it fully sets.
Curing the Concrete
- Proper curing is essential for the strength and durability of the slab. Cover the concrete with a plastic sheet or keep it damp for at least seven days.
- In New Zealand’s varying climate, ensure the slab is protected from heavy rain and strong sun, which can cause rapid drying and cracking.
Removing the Formwork
- After the concrete has cured, usually after 48 hours, you can carefully remove the formwork. Avoid heavy loads on the slab for at least a week.
Final Tips
- Safety First: Always wear protective gear, including gloves, safety glasses, and a mask when working with concrete.
- Weather Watch: Monitor the weather forecast to ensure optimal conditions for pouring and curing the concrete.
- Cleanup: Clean your tools and equipment immediately after use, as concrete can harden quickly and become difficult to remove.
By following these steps, you can successfully pour a small concrete slab that will serve as a durable and functional addition to your property. Whether you're laying the foundation for a new shed or creating a stylish patio, careful planning and execution will yield the best results.
Back...