How to Open Painted-Shut Windows in New Zealand
Date: 1 Jul 2024
Before we delve into the process of opening painted-shut windows, let’s start with a quick story. Imagine moving into a charming Kiwi home with wooden windows. Excitement fills you as you envision breathing new life into the property. A great way to start is by giving the windows a fresh coat of paint, enhancing the exterior's look.
However, another fantastic aspect of having wooden windows is the ability to open them and let in the fresh, crisp New Zealand air. Yet, you might encounter a few functional issues, such as windows being painted shut or stuck in the closed position. Some of the sashes might have been this way even before you added your new paint layer.
If you face stuck windows, don’t worry. Here’s how to open painted-shut windows, spot any damage that may need repairing, and get them functioning properly again.
Opening a Painted-Shut Window
Thankfully, if your windows are painted shut with excess paint, it can be relatively easy to free them up. This is a simple DIY task for anyone with some DIY knowledge and won’t take too long, depending on how many windows are stuck.
What You’ll Need:
- Putty knife (you may require more than one if the window is particularly stubborn)
- Utility knife
- Flat pry bar
- Paint scraper
- Hammer
- Flush-cut saw
A Step-by-Step Guide on How to Unblock Timber Windows
Cut Through the Paint Seal: Slide your putty knife between the stop bead and window sash. This will cut through the paint seal. Using a razor blade or sharp knife to cut the paint seal can also help here, but a putty knife will still be needed to break the seal fully. In the case of a multilayer paint buildup, use a multitool with Japanese teeth blades to neatly cut through the layers of old paint.
Open the Joint: Using a putty knife, begin opening the joint between the bottom sash and window sill (traditionally known as the stool).
Slide Along the Rail: Next, slide your knife along the rail where the bottom and top sash meet.
Attempt to Open the Window: Try opening the window. If it opens, jump to step 12. If not, keep reading.
Locate the Window Stop: Force a putty knife behind the window stop. You may need a few knives here.
Pry the Window Stop: Using a small pry bar, carefully pry the window stop out of the side jamb.
Remove Nails: If you notice any nails in the jamb, use your hammer to remove them.
Lift the Sash: With one window stop removed, try lifting the sash.
Remove the Other Stop: If the window sash still won’t move, remove the other stop.
Wiggle the Sash: Give the sash a wiggle from side to side. This will be enough to break the coat of paint holding it to the window frame, and it will come loose.
Cut the Sash Cords: Cut the sash cords and take out the sash.
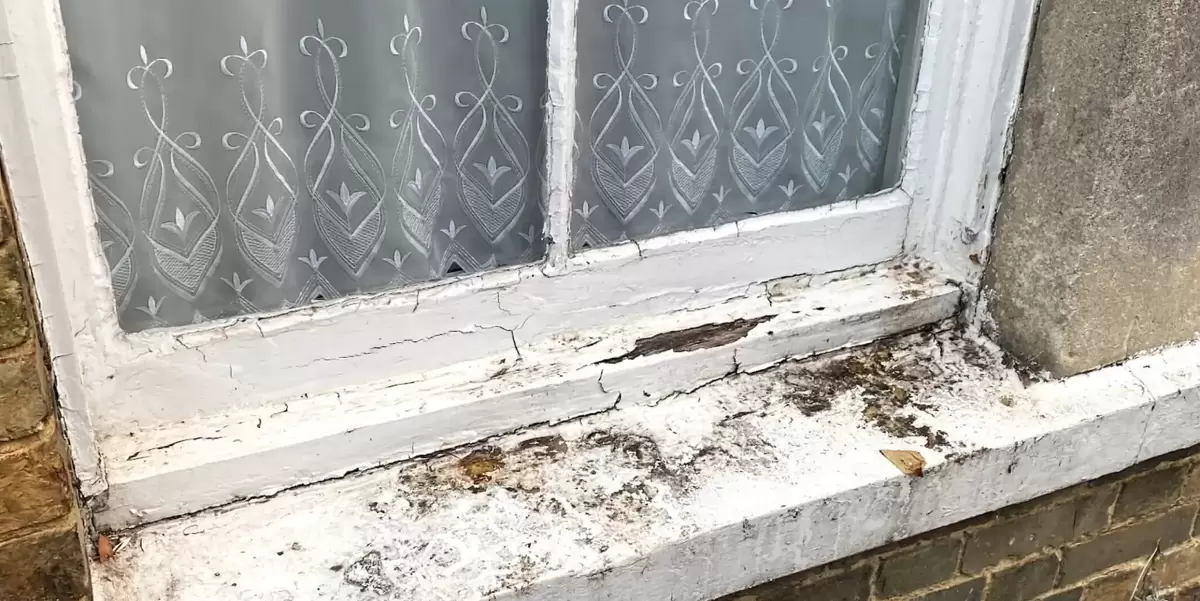
Scrape and Fill: Scrape the sash and window frame to remove any loose paint and fill in any areas required. Any nail holes and areas damaged during the removal process should be addressed. Check for rot and treat if needed. Then sand everything smooth. This step takes some elbow grease, but the results are worth it.
Prime and Paint: Prime and paint the window frame and sash with good-quality exterior primer and paint.
Reinstall Sash Cords: Install new sash cords, replace the sash, and the window stops.
Assessing the Window for Damage
If a window has been painted shut, there may be a reason why. Sometimes, the previous homeowners may have added a few coats of paint to the windows when selling the house and simply didn’t use the windows afterwards.
In other cases, painted-shut windows may have been neglected because they were broken, and the previous owners decided not to repair them.
Once the window sash is freed up, you can begin assessing for any damage.
Opening and closing the window is a good place to start. If the sash doesn’t move freely, moves unevenly, or doesn’t stay open, this could indicate a problem with the sash weights. Either the sash weights are no longer attached to the sash cord, or the weights are stuck in the frame.
If the window seems to stick as it opens, this is likely due to beads of paint or excessive paint buildup in the channels that the sash runs in. Scraping this with your paint scraper should solve this issue.
We have articles detailing common issues with sash windows on our blog that will help you restore all your sash windows and get them functioning perfectly again.
Why Do Windows End Up Being Painted Shut?
There are several reasons entire windows are sometimes painted shut. The first is that someone simply painted the window and never used it again. This is quite common when selling a home. Someone will paint the windows to improve the property's look, and the house sits for a while until you buy it and try to open it.
Another reason a window could be painted shut is that it had damage at some stage, and the homeowner didn’t want to repair it. Over years of having the windows painted, the many coats of paint cause them to become stuck.
If the windows of a home were once nailed shut, and the homeowner didn’t want to open them again forcibly, they may have simply left them alone, giving them a coat of paint every so often to keep them looking good. If this is the case, the windows will have several layers of paint as well as nails holding them shut.
Whatever the reason why your windows were painted shut, there is usually a solution to opening them again.
Back...